Debian Email Box
Contact
- Twitter: @Dubliyu
- Slack: @yourlocalgod on wcscusf.slack.com
- Email: Gmail
Table
Prerequisites
- Have your virtual environment configured
- Have the ISP gateway running.
- Have pfSense running.
Summary
An Email system is comprised of a couple of parts. First is the Mail Transport Agent or MTA for short. The MTA gets and send messages over SMTP - Postfix will be our MTA. Then the MTA passes its data off to the Mail Delivery Agent or MDA for short. The MDA, normally, uses IMAP or POP3 protocol to save the emails in an users inbox. We will be using Dovecot as our MDA with IMAP protocol. The specific differences between IMAP and POP3 aren’t necessary to know, but in general IMAP is for reading mail on the server and leaving it there, and POP3 is for reading mail on a local machine copied from the server. In our case, IMAP is simpler to setup. Lastly, is the Mail User Agent or MUA. This can refer to the user in general, or specifically to the way the user accesses their inbox. We will be using webmail as our MUA.
TL;DR This is the setup guide for the Debian Email box. We will be using a Postfix as our MTA, dovecot as MDA, and webmail as our MUA.

Setup Debian VM
-
First, go get the Debian server from ISO here. Then, open up VirtualBox, create a new Linux Debian (64-bit) VM, the default setting will do. Then alter the network settings to use Host-only adapter instead of NAT. Insert the downloaded ISO into the virtual optical drive and boot.
- Select options as follows in the installation (pretty much a standard setup)
- Choose Graphical install
- English
- United States
- American English
- “debian”
- “debian-email.com”
- {super secret password}
- {some user}
- {some user password}
- Eastern
- Guided - sue entire disk
- All files in one partition
- Finish partitioning
- Yes - write to file
- No
- United States
- ftp.us.debian.org
- No - no popularity contest
- For software selection pick only: standard system utilities
- Yes - to grub
- /dev/sda - should be the only disk
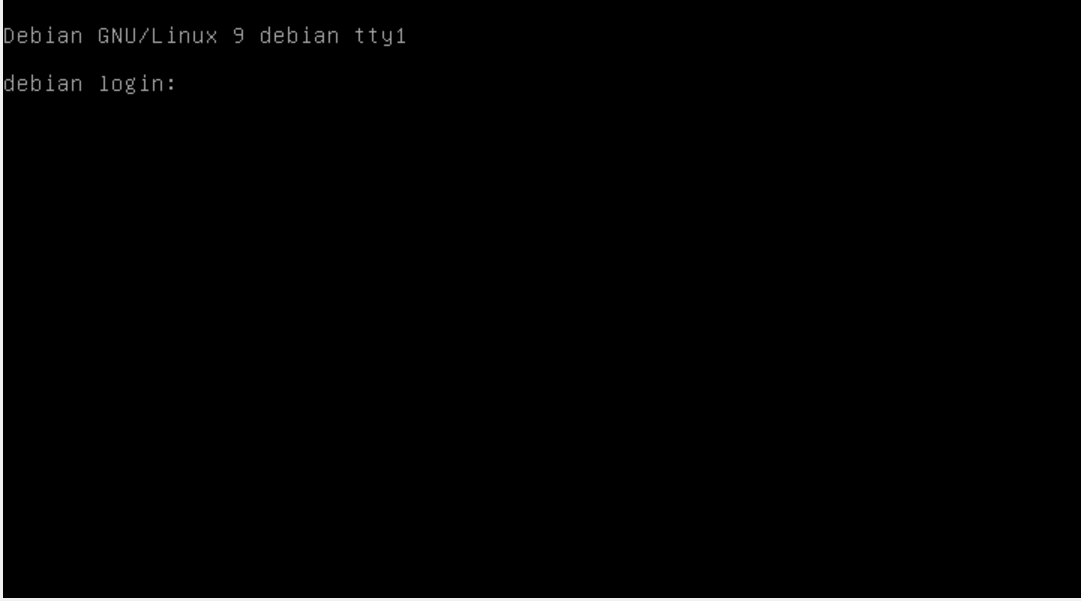
- Now you should see a terminal login prompt. Login.
Install Postfix
Here we will install Postfix.
-
Preperations
First become superuser and fetch updates
 su
 # Enter the {super secret password}
 apt-get update
 apt-get upgrade
Now install some packages that will be useful later
apt-get install -y net-tools wget curlNow open up /etc/host.conf file with
viconfigure it so it looks like so. What this does is essentially that whenever the server tries to go to any external resource, i.e. the Internet, it will first look at the host file.order hosts, bind multi onNow we add our ip and domain name ‘debian-email.com’ to the host file so it will internally resolve. Essentially, whenever out server tries to go to debian-email.com it will look at the host file, see theres a rule telling it to point to a specific ip, and go to that IP. And that IP will be the servers own IP.
First, get the IP by running
ifconfig.$ ifconfig eth0 Link encap:Ethernet HWaddr fc:aa:14:29:7a:11 inet addr:10.0.2.15 Bcast:192.168.0.255 Mask:255.255.255.0 inet6 addr: ::b9bf:5d35:cc8c:ff30/64 Scope:Global inet6 addr: ::d498:a9c5:e386:65a9/128 Scope:Global inet6 addr: fe80::b9bf:5d35:cc8c:ff30/64 Scope:Global UP BROADCAST RUNNING MULTICAST MTU:1500 Metric:1 RX packets:0 errors:0 dropped:0 overruns:0 frame:0 TX packets:0 errors:0 dropped:0 overruns:0 carrier:0 collisions:0 RX bytes:0 (0.0 B) TX bytes:0 (0.0 B)Yours will look similar, now look for
inet, use your IP instead of 10.0.2.15.Now actually set the rules.
 hostnamectl set-hostname mail.debian-email.com
 echo "10.0.2.15" debian-email.com mail.debian-email.com >> /etc/hosts
Now reboot:
reboot. Then become superuser again
2. Install postfix
``` bash
apt-get install -y postfix
# A graphical-esc inerface pops up
# For Mail Configuration: Internet Site
# Our mail name will be: "debian-email.com"
``` 3. No we need to make some adjustments to the postfix configuration

Go to `/etc/postfix` and edit the `main.cf` file with `vi`
```bash
# Find the line that reads myhostname= and change to
myhostname=mail.debian-email.com

# Add the following line
mydomain=debian-email.com  # Allows us to use use user@debian-email.com
home_mailbox = Maildir/    # Tels Dovecot where to dump our mail
smtpd_sasl_type = dovecot  # Whaat to do for authentication - Dovecot
smtpd_sasl_path = private/auth  # Config file for auth
smtpd_sasl_auth_enable = yes  # Use authentication
smtpd_sasl_security_options = noanonymous  # Dissalow anonymous login
smtpd_sasl_local_domain = $myhostname  # use debian-email.com for domain

# permit_auth_destination means skip auth if we are the destination
# permit_mynetworks means allow networks specified in my_networks
# permit_sasl_authenticated means allow if sasl auth (what we are using)
# reject, if no other restriction allows it, reject everything
smtpd_recipient_restrictions = permit_mynetworks,permit_auth_destination,permit_sasl_authenticated,reject
```

Run `postconf -n` and check there where no misspellings

Then restart postfix service
```bash
systemctl restart postfix
```
-
verify that postfix is listening on port 25
Run
netstat -ant. We are looking for two rows that readstcp 0 0 0.0.0.0:25 0.0.0.0:* LISTEN tcp6 0 0 :::25 :::* LISTEN
Install Dovecot
Here we will install Dovecot.
- install dovecot core and dovecot IMAP so that mail can be retrieved using the IMAP protocol.
apt-get install -y dovecot-core dovecot-imapd -
Go to
/etc/dovecotwe need to make some small configuration changesEdit the
dovecot.conffile withvi# Near the bottom of the file, find this line and uncomment it listen =*, ::Next edit the
./conf.d/10-auth.conffile withvi.# set as follow disable_plaintext_auth = no auth_mechanisms = plain loginNext edit the
./conf.d/10-mail.conffile withvi.# set as follow mail_location = maildir:~/MaildirNext edit the
./conf.d/10-master.conffile withvi.# Look for the commented section Postfix smpt-auth # uncomment what is there and add so it looks like... # Postfix smtp-auth unix_listener /var/spool/postfix/private/auth { mode = 0666 user = postfix group = postfix }Finally restart dovecot
systemctl restart dovecot - Verify that Dovecot is listening on the right ports by running
netstat - antagaintcp 0 0 0.0.0.0:143 0.0.0.0:* LISTEN tcp6 0 0 :::143 :::* LISTEN - Lastly, add a Maildir for every user
 echo "export MAIL=$HOME/Maildir" >> /etc/profile
 mkdir -p /etc/skel/Maildir/{cur,new,tmp}
Install Webmail
This will provide a GUI users can use to see their mail
- First we install the dependencies
apt-get install -y php7.0 libapache2-mod-php7.0 php7.0-curl php7.0-xml -
Install webmail
First go to
/var/www/htmland delete theindex.htmlfile withrmNext download the webmail installercurl -sL https://repository.rainloop.net/installer.php | php # Then you should see this after a bit...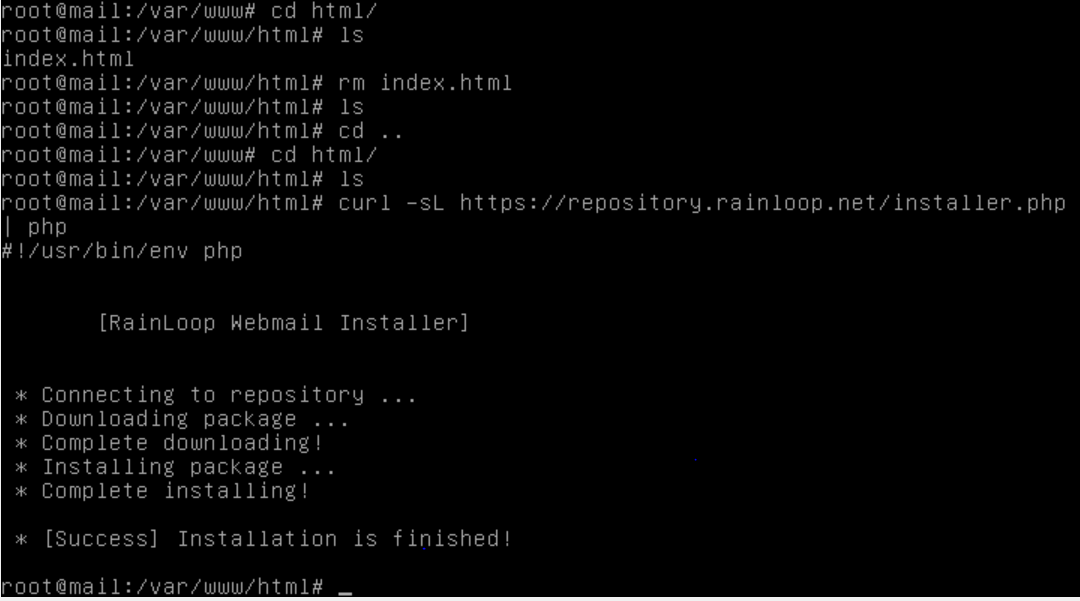
-
Access this box via the web
Assuming DNS has been setup to redirect debian-email.com to its IP, if not add the redirect your hosts file on linux/windows, or just use the IP. In any case go to http://debian-email.com/?admin or http://10.0.2.5/?admin
When you get there you will see a login page, login with…
 User: admin
 Password: 12345
Go to Domains > add
 Imap
 ------
 Server: 127.0.0.1
 Port: 143
 Secure: None
 Use short Login: yes

 SMTP
 ------
 Server: 127.0.0.1
 Port: 25
 Secure: None
 Use short Login: yes
 Use authentication: yes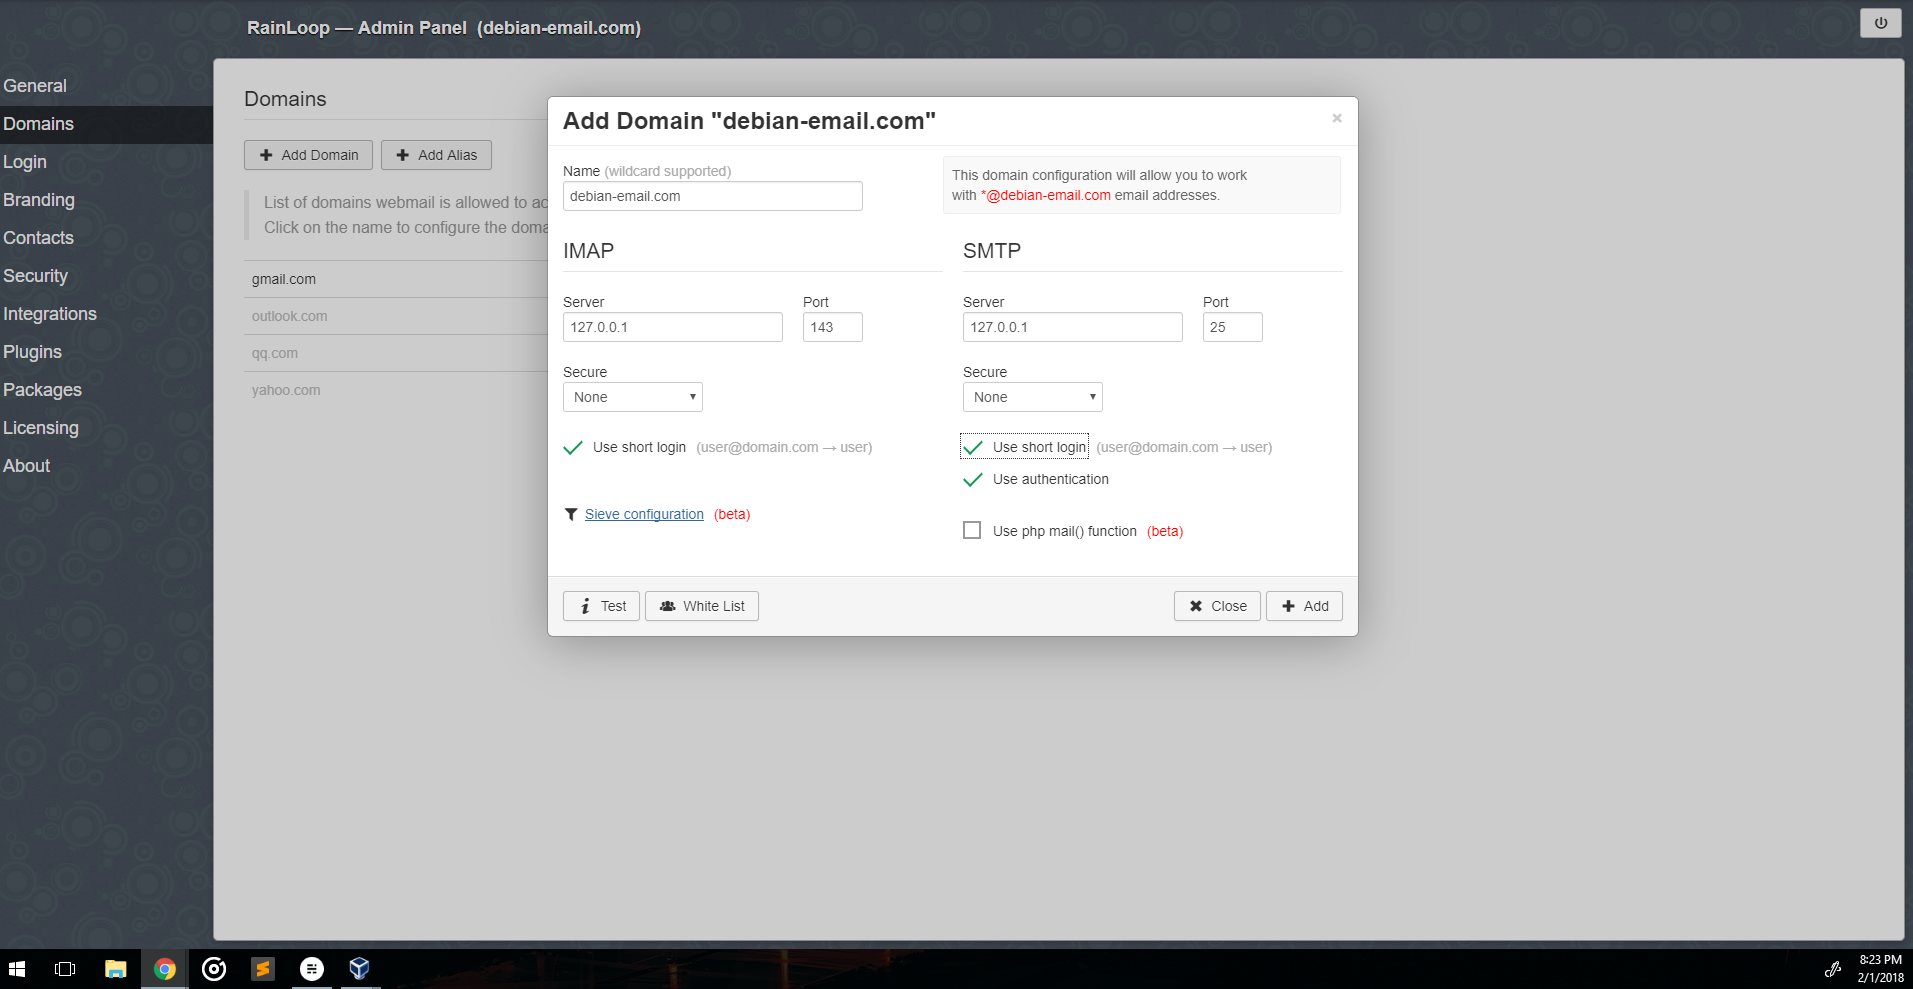
Testing
Lets make sure everything works
-
Users
Every user on the box should have a Maildir folder To test this, add a new user. The -m means create a folder in home for them.
useradd -m jeff passwd jeff # We should see a Maildir folder exists ls /home/jeff # We should see a cur, new and temp folder exists ls /home/jeff/Maildir -
SMTP
If everything went right, SMTP should be working. To test that out install
mailutilsapt-get install -y mailutils # Now execute these commands echo "TEST EMAIL" | mail -s "testmail" jeff mailq mailNow
catout the contents ofjeffuserMaildir/newfolder content# use tab autocomplete here since the file name will be long cat /home/jeff/Maildir/new/[tab] # Expect something like Return-path: <root@mail.debian-email.com> X-Original-To: jeff@mail.debian-email.com Delivered-To: jeff@mail.debian-email.com Received: by mail.debian-email.com (Postfix, from userid 0) id A981141DF1; Thu, 1 Feb 2018 20:50:14 -0500 (EST) Subject: testmail To: <jeff@mail.debian-email.com> X-Mailer: mail (GNU Mailutils 3.1.1) Message-Id: <214324242342342342.A981141DF1@mail.debian-email.com> Date: Thu, 1 Feb 2018 20:50:14 -0500 (EST) From: root@mail.debian-email.com (root) TEST EMAIL -
Webmail
Use the user we created and log in to webmail
 login
 -----
 jeff@debian-email.com
 password
Confirm that you can indeed login. From here you should be able to see you inbox with has the mail we sent from earlier.
Photo by Lauren Mancke / Unsplash